Enhance the Interior of a Newly Constructed Modern Log Cabin

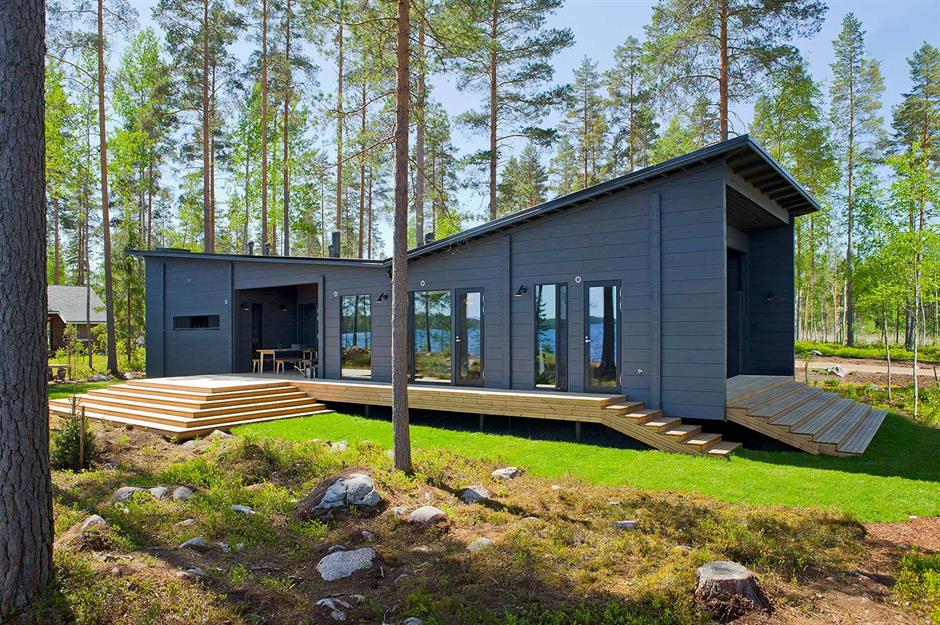
Whether you have just finished building your log cabin or you’re planning to remodel it, you need to make sure that the interior looks great. Using the right colors and materials can help you create a welcoming atmosphere.

Drywall

Adding drywall to a newly constructed modern log cabin can give it a stylish look and increase its efficiency. It is also a great way to create a functional accent piece.

Using drywall to enhance the interior of a log cabin will allow you to create an open and spacious feel. It is also easy to install and inexpensive. It can also be used to create a flat surface for hanging decorations.

When adding drywall to a log cabin, it is important to make sure that it is installed only on the wood frame. Otherwise, you can end up with holes where you can’t install any drywall.

One way to enhance the interior of a log cabin is by using light colors. For instance, a whitewash or clear neutral will be a good choice. You can also add textured materials to add color and flair.

Another way to enhance the interior of a log home is to increase the height of the walls. This is especially helpful in bathrooms. By raising the wall height, you can create a more spacious interior. You can also add insulation to the walls for additional energy efficiency.

Log Cabin

Lighting

Whether you are building a log cabin from a trusted home builder or have an existing one, lighting is an important aspect to consider. It not only adds beauty to your home, but it also adds safety. In addition, it can make the difference between a cozy cabin and a cold one.

There are many types of lighting options for log cabins. Some are more technologically advanced than others. You’ll want to make sure you choose the right type of lighting for your needs.

The best way to light up your log cabin is to combine natural light with soft lighting. A chandelier is one way to accomplish this. There are dozens of different styles to choose from.

You can also use a combination of recessed lights and wall sconces. This is especially helpful in bathrooms. A combination of these two light sources will be the perfect way to get some light to the corners of the room.

There are also plenty of options for outdoor lighting. You can use solar lights for a magical touch. In addition, you can install floodlights to illuminate your log cabin.
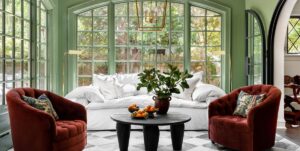
Contrasting colors

Using contrasting colors to enhance the interior of a new log cabin can be a fun way to add some personality to your home. Although a rustic or log cabin interior is often thought of in brown and earth tones, it can be enhanced with the right colors.

For example, a red wall is a fun way to add some color. You can use a red door handle, red drapes, or red artwork to add some color without going overboard.

A brightly painted sofa or chair can be a fun way to add some life to your log cabin. A bold chandelier can add a sophisticated touch.

The right colors can make a room feel warm and cozy. You can also use wood to create a dark and moody interior. The right flooring can add character to a room as well.

A fireplace is a great way to add interest to the interior of a log cabin. For a modern home, you can use brick or stonework to accent the fireplace.

Fireplaces

Whether you are building a new home or just want to upgrade the look of your existing home, adding a fireplace can make a huge impact. Fireplaces are not only useful for heating your home, but they also add character and ambiance. They help add value to your home and are a great focal point for any room.

Fireplaces have come a long way since the days of traditional wood-burning fireplaces. Today, there are gas fireplaces, artificial gas fires, and rustic wood burners. The design options are virtually endless.

Gas fireplaces are cleaner to operate than wood-burning fireplaces, and they don’t leave the rest of your house freezing cold. Some models come with a thermostat, which allows you to control the temperature of the fireplace. You also don’t have to worry about tending to the fire.

Gas fireplaces don’t require a full chimney, which makes them safer and cleaner. Many come with an on/off switch. They can also be vented through the roof or wall.

Beautiful Home Design Customization while Ensuring Your Family’s Privacy


In today’s fast-paced world, striking a balance between designing a beautiful home tailored to your preferences and safeguarding your family’s privacy can be challenging. However, fear not, as we will discuss how a stunning home can seamlessly integrate privacy.

Importance of Home Design Customization

A home is not just a place to live; it is a reflection of your personality and a sanctuary where you can unwind and spend quality time with your loved ones. Home design customization plays a crucial role in creating a space that truly feels like your own. By customizing your home design, you can infuse your personal style and preferences into every corner, making it a unique and inviting place.

Customization allows you to choose the colors, materials, and finishes that resonate with your taste. Whether you prefer a modern, minimalistic look with clean lines and neutral tones, or a cozy, rustic ambiance with warm colors and natural textures, the possibilities are endless.

Balancing Aesthetics and Privacy in Home Design

While aesthetics are important, privacy is equally crucial when designing your home. After all, it is your sanctuary, and you should feel comfortable and secure within its walls. Striking the right balance between aesthetics and privacy can be challenging, but it is not impossible.

Factors to Consider When Customizing Home Design for Privacy

When customizing your home design for privacy, several factors come into play. It is crucial to consider these factors to create a space that meets your privacy needs without sacrificing aesthetics.

Layout and Architectural Elements for Privacy

The layout of your home plays a significant role in ensuring privacy. By strategically placing walls, doors, and windows, you can create separate zones that offer privacy to specific areas. Utilizing architectural elements such as alcoves, nooks, and built-in bookshelves can also help create intimate spaces within larger rooms.

Window Treatments and Coverings for Privacy

Windows are an essential element of any home design providing natural light and a connection to the outdoors. However, they can also be a potential privacy concern. To address this, consider incorporating window treatments and coverings that offer both privacy and style. Options such as blinds, curtains, and frosted or tinted glass can provide the desired level of privacy while enhancing the overall aesthetic appeal of your home.

Landscaping and Outdoor Design for Privacy

Privacy extends beyond the walls of your home. Creating a private outdoor space is equally important, especially if you have a backyard or a garden. Landscaping elements such as hedges, trees, and fences can provide a natural barrier, shielding your outdoor area from prying eyes. By incorporating these elements thoughtfully into your outdoor design, you can create a secluded oasis where you can relax and enjoy the beauty of nature without compromising on privacy.

Working with a Professional Designer for Customized Privacy

Designing a home that balances aesthetics and privacy requires expertise and creativity. Collaborating with a professional designer who specializes in home customization can make a significant difference in achieving your desired outcome. A professional designer will work closely with you to understand your lifestyle, preferences, and privacy needs. They will offer expert advice and creative ideas to create a home that not only looks stunning but also protects your family’s privacy.

Transforming Your House into a Dream Home: Unleashing Creative Decorating Ideas for Every Room

Get ready to explore a myriad of inspiring house decorating ideas that will infuse charm and character into every nook and cranny of your living space. From the living room to the bedroom, kitchen, and beyond, we’ve got you covered with creative concepts that will elevate your home décor to new heights.

Living Room Retreats: Cozy and Stylish Designs

The living room stands as the heart of your home, where family and friends gather to unwind and find solace. Unravel captivating ideas to transform your living room into a cozy retreat that radiates warmth and comfort. Embrace the art of playing with color palettes; opt for soft, earthy tones to create a calming ambiance or embrace vibrant shades for an energizing touch. Pay careful attention to furniture arrangement – consider crafting intimate seating areas to foster heartfelt conversations. Another brilliant suggestion is to weave in various textures, such as plush throw pillows, cozy blankets, and luxurious rugs, to make the room irresistibly inviting. Don’t forget to adorn the space with decorative elements like artwork, mirrors, and indoor plants to add a personal touch and amplify the visual appeal. Armed with these tips, you’ll have a living room that impresses guests and makes leaving a challenging task.

Bedroom Bliss: Personal Sanctuaries for Relaxation

Your home decorating ideas journey begins with crafting a tranquil haven for your bedroom—a space where you can escape the daily stresses and find peace within. Unravel a treasure trove of creative ideas to transform your bedroom into a soothing sanctuary, tailored to your unique tastes. Start by embracing the magic of a calming color palette, indulging in soft blues or earthy neutrals that foster relaxation and harmony.

Invest in quality bedding and comfortable pillows, curating the perfect setup for a restful night’s sleep that rejuvenates your spirit. Elevate the room’s ambiance with soft lighting fixtures, such as bedside lamps or fairy lights, enveloping your space in a warm and cozy glow.

To maintain a clutter-free environment, discover the wonders of organizational solutions like shelves and storage ottomans. Now, it’s time to add a personal touch, infusing the space with framed photos, decorative accents, or even creating a cozy reading nook—the canvas is yours to paint.

With these carefully curated ideas, your bedroom will metamorphose into a blissful retreat, a haven that enriches your well-being and resonates with your inner essence.

home decorating ideas

Kitchen Chic: Revamp Your Culinary Space

The kitchen transcends its role as a mere cooking area; it embodies the heart of your home’s culinary journey. Unearth innovative kitchen decorating ideas that strike the perfect balance between functionality and style. It all starts with choosing a color scheme that harmonizes with the rest of your home and brings out your kitchen’s unique personality. Consider adding a stylish backsplash to add visual interest and protect the walls from spills and splatters. Clever storage solutions, like pull-out drawers and hanging racks, can help keep your kitchen organized and clutter-free. Incorporating natural elements, such as potted herbs or a small indoor garden, can breathe life into the space. Lastly, invest in quality kitchenware and appliances that not only serve their purpose but also add aesthetic value to the kitchen. Armed with these tips, your kitchen will exude chic elegance and become an inviting space for both cooking and socializing.

Home Office Inspirations: Boost Productivity in Style

In the era of remote work, creating a home office that fosters productivity and focus has become paramount. Learn how to design a stylish and functional workspace that reflects your taste while maximizing efficiency. Start by choosing a designated area for your home office, preferably in a quiet corner with ample natural light. Consider ergonomic furniture to promote a comfortable working environment and reduce the risk of strain. Personalize your space with inspiring artwork, motivational quotes, or vision boards that keep you motivated throughout the day.

Incorporate efficient storage solutions like shelves, drawers, or filing cabinets to keep your workspace organized. Adding plants to your office can improve air quality and bring a touch of nature to your surroundings. With these ideas, you can create a home office that inspires creativity and supports your professional endeavors.

Outdoor Oasis: Elevate Your Patio and Garden Decor

Extend the beauty of your home to the great outdoors with captivating patio and garden decorating ideas. Whether you have a spacious backyard or a cozy balcony, we’ve got tips on selecting outdoor furniture, creating cozy seating areas, and adding greenery to create a serene outdoor oasis. Start by choosing durable and weather-resistant furniture that complements your style, whether it’s a chic bistro set or a comfortable outdoor sofa. Create cozy seating areas with outdoor cushions and throw pillows to make your space inviting. Enhance the ambiance with outdoor lighting, such as string lights or lanterns, for enchanting evenings.

Don’t forget to introduce greenery to your patio or garden; potted plants, hanging baskets, and vertical gardens can infuse life and freshness into the space. Consider incorporating an outdoor dining area or a fire pit to enhance outdoor entertaining possibilities. With these ideas, your outdoor space will evolve into an oasis for relaxation and social gatherings.

Renew Your Old Flooring With Paint

One of the most popular ways to revitalize an old wood floor is to apply paint to it. While this can be an expensive process, a fresh coat of paint can breathe new life into an old floor. Painted wood floors are an important part of many historic homes, and they are an effective way to bring life to an old floor that has suffered from a lot of damage.

They are a practical way to freshen up a heavily damaged floor

Painting over heavily damaged hardwood floors is an affordable and practical way to restore them. While it can be expensive and time-consuming to repair or replace a floor entirely, paint allows you to add a fresh coat of color to a floor that looks dull or faded. Before you begin painting, however, you should determine the condition of the wood. If the wood is very old or of low quality, you may not be able to get a stain that will stay on the floor.

Before you begin painting, you must clean the floor thoroughly. Thorough vacuuming and a floor stripper are important. Make sure to remove any dust and debris to avoid creating additional problems. Afterward, you must remove the old finish and the paint. If the paint has already chipped and is scuffed, you may need to remove it again.

old flooring

They are more expensive than restaining

Renewing old flooring with paint is more expensive than retaining it, but it can bring the floor back to life. It can also mask damage from water and stains. But it’s important to know the condition of the floor before starting the project. If the wood is old and of low quality, it may not be suitable for staining. It may also need to be sanded before it can be repainted.

If your floors are in good condition, you may not need to sand or stain them. You may only need to restain them if you want to change their color. Restaining a floor with different color will add between $1 and $3 per square foot. It also adds around $30 to $100 per gallon, depending on the stain you choose.

They are harder to apply

Before you begin applying the floor finish, you’ll want to make sure you have all the tools you need. The process is easier said than done, and you should be assisted by a helper if you need assistance with the edges of the floor. Once you’ve gathered all of your materials, prepare to spread the floor finish evenly. Make sure to follow the applicator’s directions to avoid streaks or drips. You’ll also need an applicator block or broom handle.

They are harder to clean

Painting old flooring can be a great way to spruce up your home, but you should be careful when choosing the paint. You should choose an oil-based paint that’s easy to clean and scuff-resistant, as latex paint requires about 30 days to form resin bonds. Latex floor paints can also contain urethane for added scuff resistance.

How to Install a Low-Cost Stair Runner

If you’re considering a stair runner for your home, there are several factors to consider. These include cost, pattern, and installation time. It’s also important to make sure you get the installation done right. Listed below are several tips for getting the job done right.

Costs

A low-cost staircase runner can add style to your staircase without breaking the bank. It costs as little as $20 to install, depending on the type of carpet and its materials. The price will go up if you have custom steps, which will add another fifteen to twenty percent to the cost. You can find low-cost runners at local flooring stores, which can help you select one that matches the existing look of your stairs.

While most stair runners are custom-made, some are off-roll carpets. The most expensive carpet runners are made from fine wool, which is more expensive than regular carpets. You can choose a variety of styles, including the waterfall design that flows over the stairway. Alternatively, you can choose a Hollywood runner that is tacked down around the tread and fits close to the risers.

Patterns

If you’re on a budget, you can still have a nice-looking stair runner without breaking the bank. You can even paint the stairs! If you’re going for a nautical theme, consider using nautical stripes. They look great, and they’ll hide any stains, too!

Stair runner patterns are available in a variety of styles. They can be a solid color, patterned, or multicolored. This will allow you to match them with your home’s existing decor and area rugs. Runners also have the added benefit of hiding wear and tear.

stair runner

Costs to install a stair runner

The cost of installing a low-cost stair runner varies depending on the size and shape of the stairs. It can be as low as a few dollars per square foot, or as high as several hundred dollars. However, this price does not include the cost of removing the existing carpet and materials.

Runners are made of the same materials as wall-to-wall carpets, although they are not as common as full carpets. Plastic and vinyl runners are commonly used for stairs because they protect the carpet underneath and prevent wear. Most are made from synthetic fibers, such as nylon or polyester.

If you are installing a runner yourself, it is best to hire a professional to do the job. However, it is possible to DIY a stair runner. You will need to measure the steps and cut the rods to fit the steps. After that, you will need to drill holes in the steps and on either side of the runner.

Getting it right

There are several basic steps to take when installing a low-cost stair runner. You need to get the measurements right so that you can get a good-looking finish. Measure the tread and risers to make sure the runner is the correct size. You can use a measuring tape or string to get the exact measurements. Once you have the measurements, you can cut the carpet runner to fit. To cut the runner, use a strong pair of scissors, shears, or a utility knife. If you have a partner, it will be easier to work together on the task.

The first step is to mark where each runner’s edge is going to start and end. Measure at least one inch from each riser, and mark where each end is going to go with the staircase. Make sure the rod is taut, and that the runner is the same length as the staircase itself. Once you’ve cut the rods to the proper length, you can drill them into the steps and either side of the runner.

Slippage issues on stair runner

Stair runners should be installed with caution. They may slip out of place and cause a dangerous tripping hazard. It is recommended that you purchase carpet padding that is made specifically for stair runners. However, this will only work if you have a carpeted floor. Once you have the runner in place, you need to adhere to it using double-sided carpet tape. Place the tape along the riser of the first tread. Then, press the top edge of the runner onto the carpet tape.

When choosing a stair runner, try to choose a dark color, rather than a light one. Also, avoid matching patterns, which can be wasteful and increase the price of the product. Many homeowners don’t realize that there are two basic styles for stair runner installation. There is the waterfall runner, which flows over the stairs, and the Hollywood runner, which is tacked down along the tread and fits close to the risers.

Add Crown Molding the Easy Way

If you are looking to add crown molding to your home, you have come to the right place. This article will cover the materials used to make crown molding, how to install it and what to expect once you have finished. There are several simple steps to follow when adding crown molding to your home. You can also hire someone to do the job for you.

Cost of crown molding

The cost can vary widely. It can be extremely expensive if you want to have the molding installed professionally, but do-it-yourselfers can save money by doing the work themselves. Prices are based on the total cost of materials and supplies. For example, wood crown molding can cost more than PVC. Exotic woods like mahogany or stained oak will add to the overall cost.

The installation costs can range from $2 to $6 per linear foot, depending on the style and complexity of the job. Prices vary by material, as well, with solid wood costing about $10 to $15 per linear foot. Polyurethane and PVC cost between $2 and $6 per linear foot, and medium-density fiberboard can cost anywhere from $1 to $3 per linear foot.

Installation costs vary greatly, and the amount you pay will depend on many factors. These factors include the type of crown molding you want and where you need it installed. It includes the cost of the materials, labor, and supplies necessary for the project, as well as any repairs needed before the installation. You should also budget for cleaning the space where the molding will be installed.

Furthermore, the installation requires a moderate to a high level of trim carpentry. It is important to have the necessary tools and experience to make sure the job is done right. It is more challenging than installing other types of trim, and there is a greater chance of error. Fortunately, there are online tools and services that make the process simple and accurate.

crown molding

Materials used to make crown molding

There are many types of materials used to make crown molding. The most common is wood. There are several types of wood available, including mahogany, pine, and oak. Wood molding can be expensive and requires expert installation to stay intact. Other materials used to make molding include plaster and plastic. Plaster is a good choice for some projects, but can warp and shrink in extreme weather conditions.

Another option is MDF, which is a composite material made from sawdust fibers and resin. It is cheaper than solid wood but is less durable. You can also cover it with wood veneer if you prefer a more authentic look. MDF is also easier to cut and is more likely to nick and dent than solid wood, so make sure you check with your contractor before making the final decision.

Crown molding is great for enhancing the interior of your home. It can cover cracks on ceilings and walls and add interest to a room. It also makes upper cabinets look more appealing. Crown molding adds height to a room and makes it feel more expansive. The decorative elements of crown molding also give it a classy appearance.

Crown molding can be a great addition to any room. It looks great on a wide ceiling, but can also be used to accentuate a smaller space. Small rooms can be made to appear larger by using light colors, and it can even make a non-square room more attractive.

Installation method

There are several different ways to install crown molding. One easy method is to use clip-on molding, which can be installed in the afternoon. These moldings are easy to install and look polished. All that’s required is painting the surface and screwing the molding to the wall. If you’re not comfortable working with hammers and other tools, you can opt to use adhesives instead. Read the manufacturer’s instructions before using any adhesives.

First, measure the length of the wall where you’d like to install the molding. Make sure to measure from corner to corner. Then, mark this measurement on the bottom of the crown molding. Make sure that the mark indicates the direction of the cut. If you have to cut the molding along the edge of the wall, you may need to cut the crown molding at an angle.

Once you’ve measured the wall, you’ll need to figure out how much crown molding you need. Most of the time, it’s easiest to just cut the molding to fit in between studs. You can also buy pre-cut pieces that have an exact miter cut, which makes it easy to conceal wires. Once you’ve got a rough idea of the length of the crown molding, you can begin buying it. You can also label each piece with a pencil number to match your plan-view drawing.

A second method is to splice two pieces of crown molding. This method is known as the scarf joint. The first piece should be cut with a 90-degree angle on one end, and the adjoining piece should be held upside-down. Next, you need to use a miter saw to make a 45-degree inside cut on the second piece.